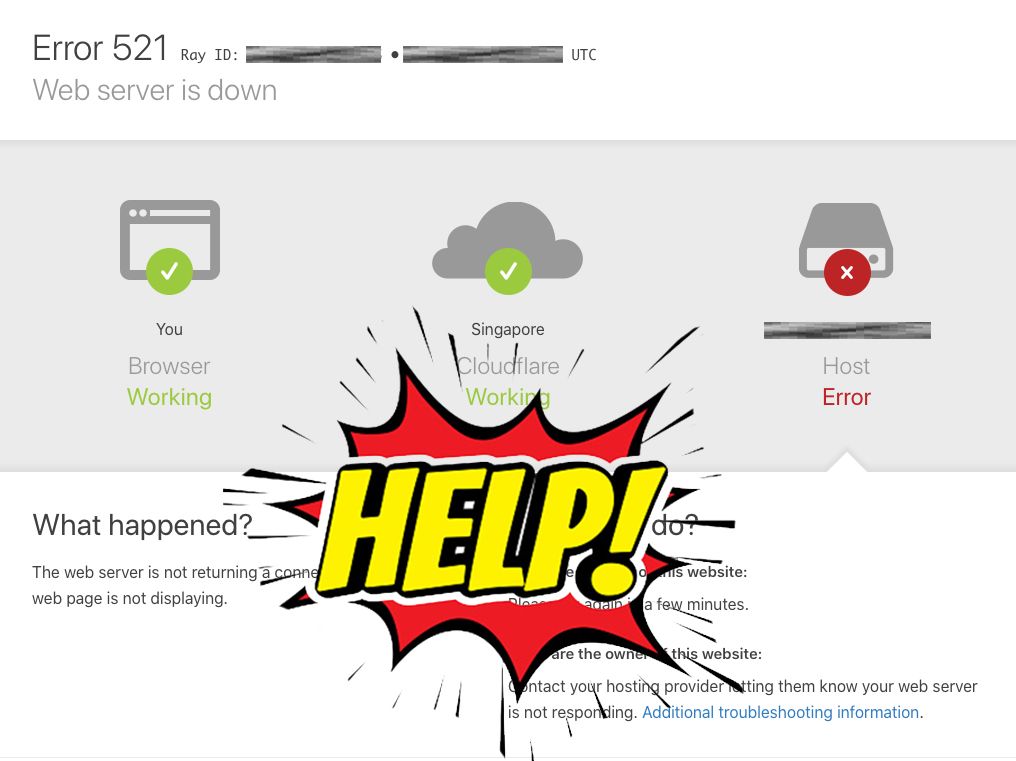
Resolving Error 521 (Website Is Down) On CloudFlare & Re-Enabling Secure HTTPS Connections—Solutions
This disclaimer informs readers that the views, thoughts, and opinions expressed in the following article belong solely to the author, and not necessarily to the author's employer, organization, committee, or other group or individual. The following write-up is a personal perspective based on the author's personal experience and account.
The author shall take no responsibility or be affiliated with any of the readers' own take or experiments to replicate the results expressed in this article. Readers are reminded to practice self-caution, safety, and calculated risks prior to any experimentations, as well as to double-check on details prior to any potential actions or purchases.
What's Happening?
This Error 521 is specific to CloudFlare. If you can see it, it means your web browser is successful at connecting to CloudFlare via your input Domain URL, but CloudFlare isn't successful at connecting to the URL's origin web server.
Often, it is related to a security measure like a software firewall or most likely a HTTPS connection issue related to SSL/TLS certificate-authentication.
Getting It Resolved
The following assumes you know how to apply a SSL Certificate to your origin web server / web host to help enable a secured HTTPS connection between your CloudFlare and origin web server / web host.
There is a few repeating steps to help change and re-test your settings to make it work.
STEP 1—Check that your CloudFlare DNS points to your Web Server / Web Host
Ensure that you must have an entry in your DNS > DNS Management, with "Type A Record" with Name <yourwebsite.com>, Content <server ip address: eg. 192.92.92.92>, TTL auto and Proxy status Proxied.

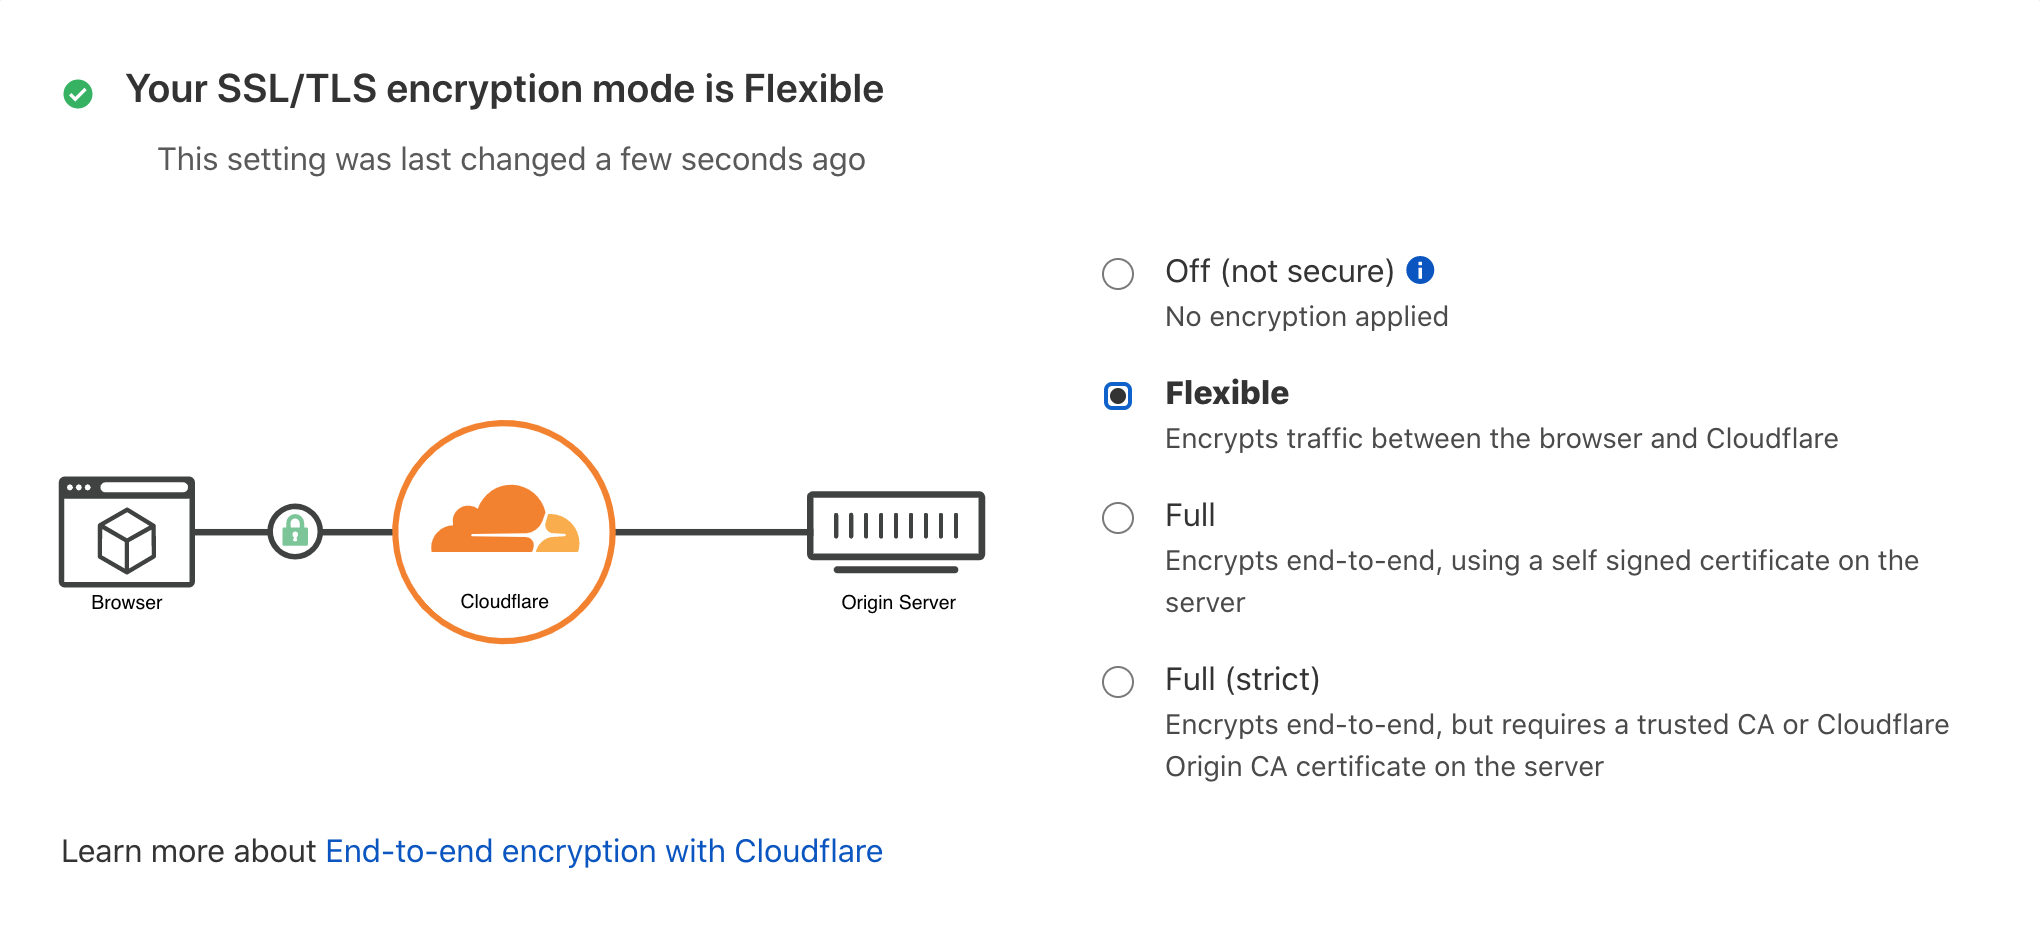
STEP 2—Switch back your SSL/TLS encryption mode to default "Flexible"
Go to SSL/TLS > Overview, and within the SSL/TLS encryption mode, Select Flexible. This will pre-lower the security measures to allow for re-testing of the connection to your origin web server / web host thereafter.
STEP 3—Switch back your Always Use HTTPS to default "Off"
Go to SSL/TLS > Edge Certificates > Always Use HTTPS, and Switch to Off. This will re-enable any HTTP web browser connections to your origin web server / web host, to further test if the connection will work directly when using your URL without any HTTPS secured connections.

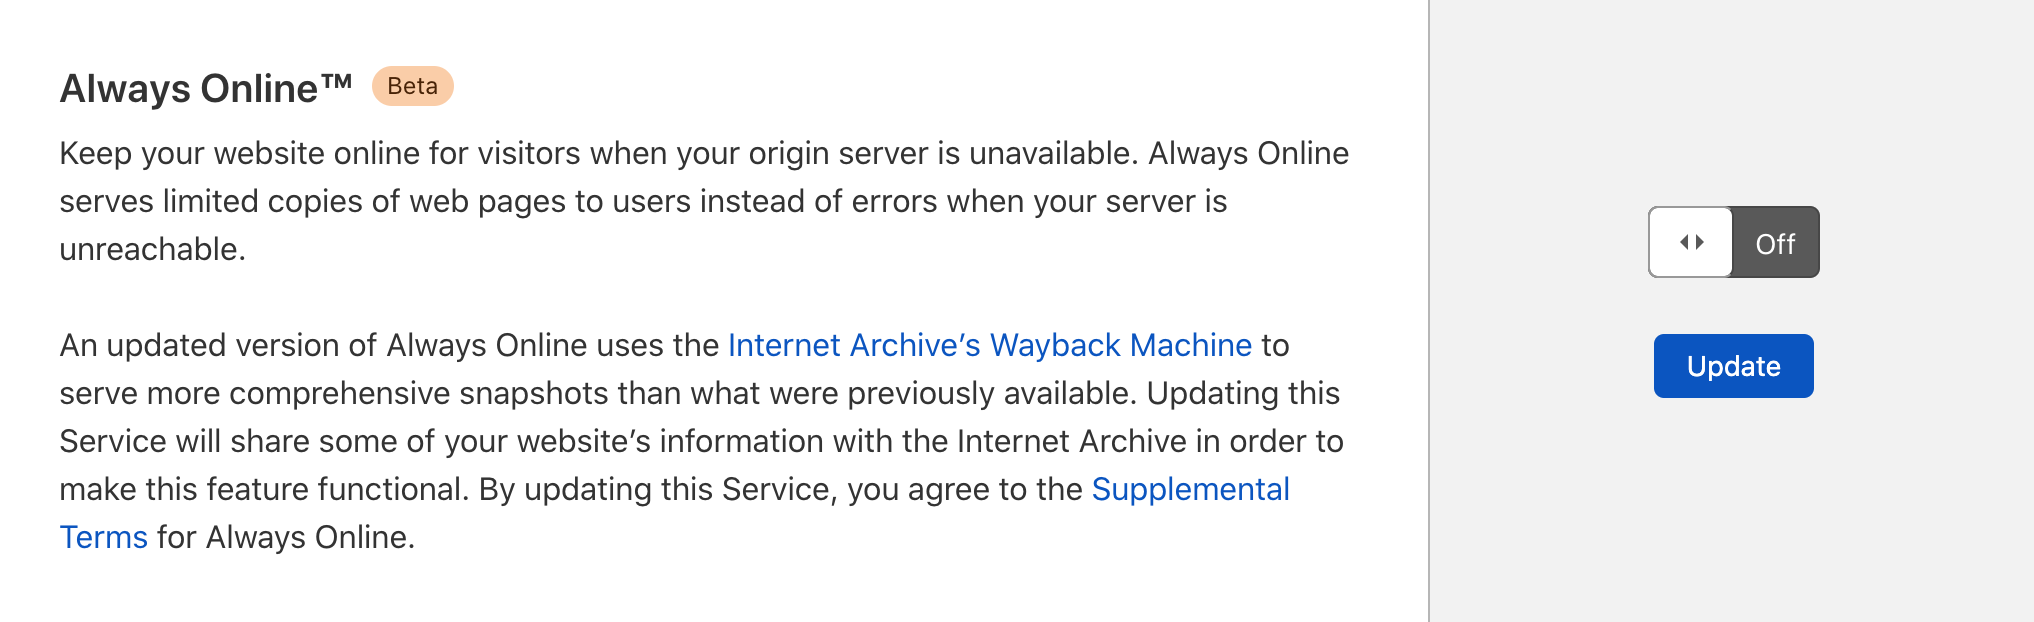
STEP 4—Switch back your Always Online™ to default "Off"
In the event that you website has been online and stable for quite a while, do consider eventually switching "On" this option.
This function ensures that there is a sketchy backup of your "last loaded image of your website" that is still made available for visitors to view your website despite it being "disconnected" from the origin web server / web host.
Go to Caching > Configuration > Always Online™, and Switch Off, then Click Update. This will take a few Page-Purging + Page-Refreshing to eventually clear the cache-backups for your website. Thus, if you have this function previously "On", it may take a while.
STEP 5—Purge Cache for your website's CloudFlare account
This step helps to do a "Clean Reset" by clearing old files or settings pre-loaded into CloudFlare's cache system.
Go to Caching > Configuration > Purge Cache, and Click Purge Everything.

STEP 6—Sort Out your Origin Web Server / Web Host's SSL/TLS Certificate
On your origin web server / web host end, you will need to install a SSL/TLS certificate to enable the connection when we turn back on the other settings within CloudFlare.
If you are using WordPress or Ghost, the job is much easier. In WordPress, you can find plugins to help you resolve the task, while for Ghost, the CMS Platform will help you register a Free SSL Certificate via Let's Encrypt!.
After affirming that you have completed the SSL Certificate installation, then should you move on to Step 7.
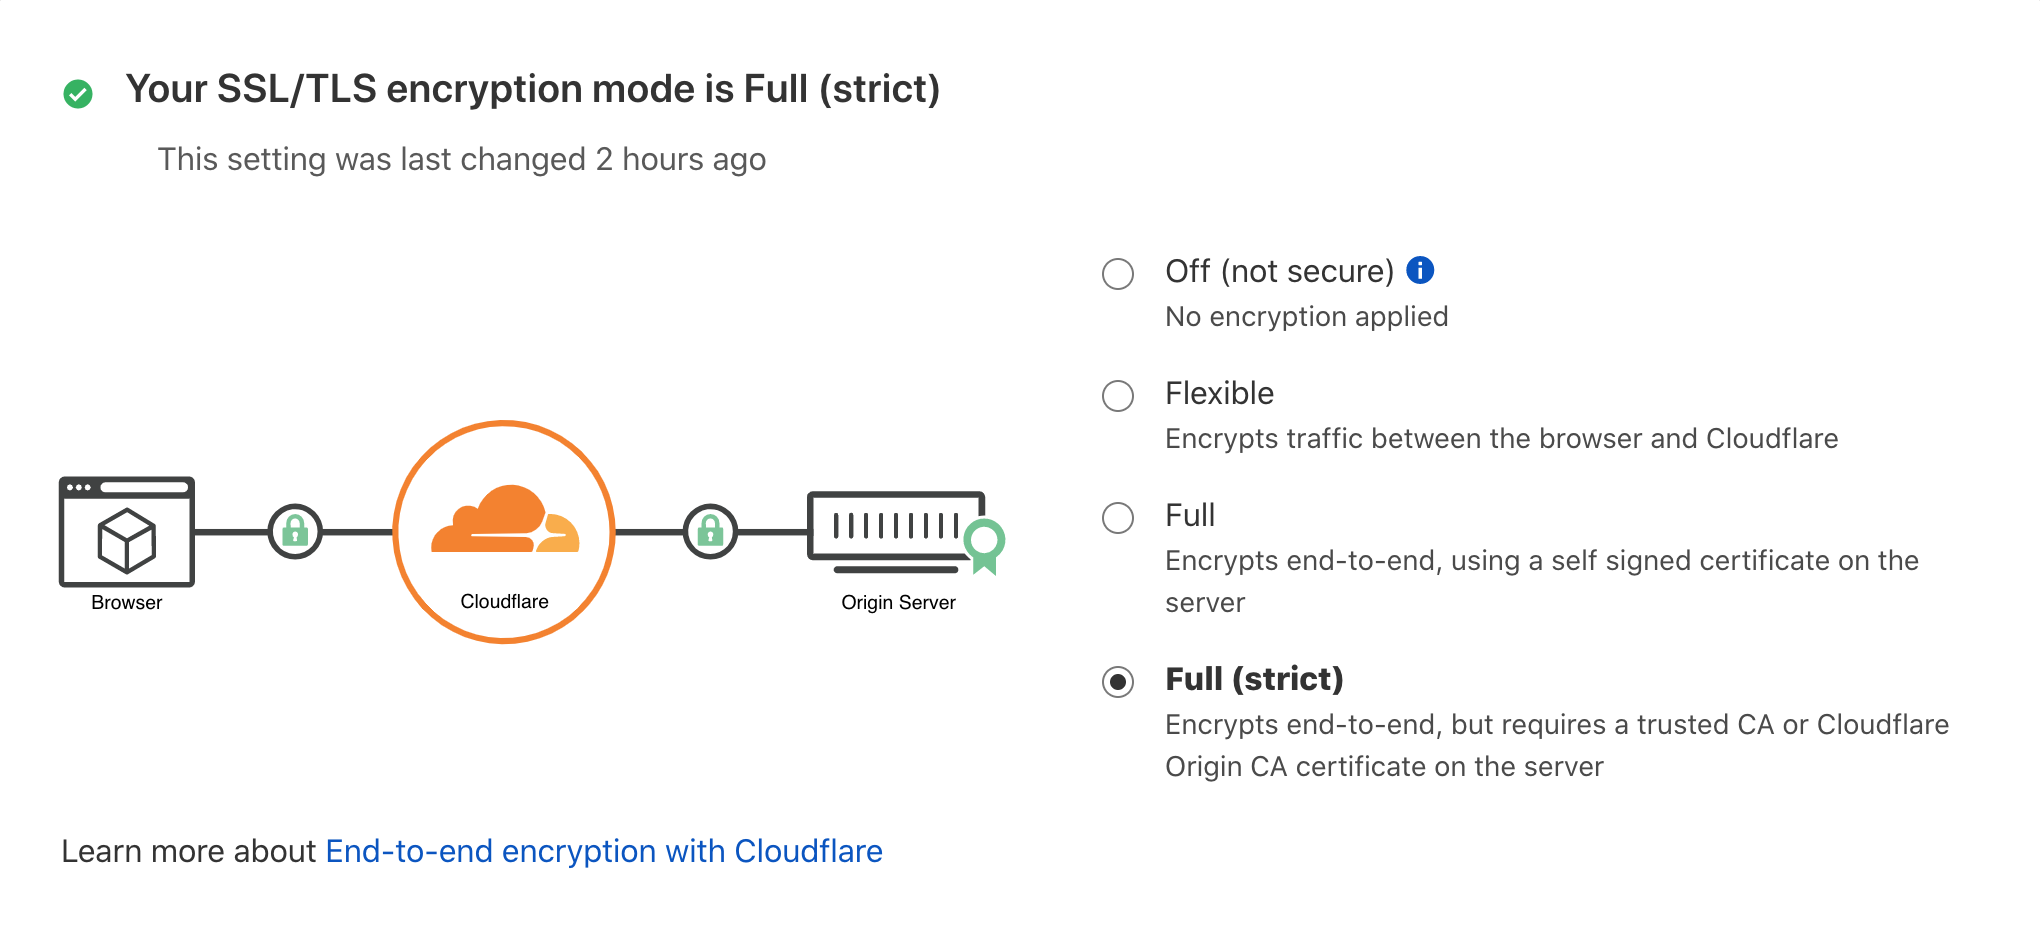
STEP 7—Revert your SSL/TLS encryption mode to "Full (strict)"
Assuming you have "secured" your origin server-side connection with a SSL Certificate installation., go to SSL/TLS > Overview, and within the SSL/TLS encryption mode Select Full (strict). This will inform CloudFlare to up the security protocol to the strictest level.
STEP 8—Revert your Always Use HTTPS to "On"
Go to SSL/TLS > Edge Certificates > Always Use HTTPS, and Switch to On. This will ensure that all connections made with your Domain URL are now being "forcefully-converted" into secured HTTPS connections.

After which, Repeat Step 5 to Purge Any Potential Cache from CloudFlare to allow for a better connection test in Step 9.
STEP 9—Enter your Domain URL in your web browser
Now test out your Domain URL https://yourdomain.com in your web browser. Your connection now should work perfectly fine!
If your connection still doesn't work after a few browser refreshes, Re-Try Steps 2 & 3, then Steps 5-9 again. From my experience, it will somehow work out.
If the connection is really stuck, the problem might usually lie in the origin web server's / web host's SSL/TLS Certificate setup.
Hope this helps! Cheers! 😁